Windows 10 – Change Speech Recognition Profile
Suppose if you have Set Up Speech Recognition in your Operating System (Windows 10). Speech Recognition will Automatically Control your Operating System with Your Voice Without desire a Keyboard And Mouse.
You can Also Use Speech Recognition to open Menus, And Hit buttons and other objects on the Screen (Windows 10).
It Will Store information about how to Recognize your voice. You can Change Profiles to Recognize a Particular voice or a Particular noise environment.
It is Available only for the Following Languages Such as the United Kingdom, India, German, United States, Canada, Japanese, French, Spanish and Australia.
How To Change A Speech Recognition Profile in Windows 10
Step Number 1, You will Need to Open the Classic “Control Panel” Page.
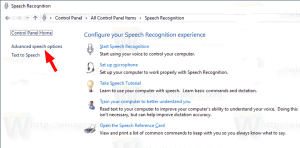
Step Number 2, I will recommend you to go to Control Panel/Ease Of Access/Speech Recognition.
Step Number 3, In your Screen on the Left Side, You will Need to Hit on the “Advanced Speech Option” Button.

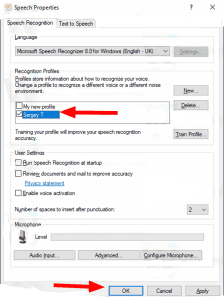
Step Number 4, If you are in Speech Properties Dialog You will need to Turn on a Profile you wish to use in Recognition Profiles Section (Windows 10).
Read Also: Facial Recognition – What You Are About to See Will Shock You

Step Number 5, You are Completely Done just Click on “Ok” Button.
How To Delete A Speech Recognition Profile in Windows 10
Step Number 1, You will Need to Open the Classic “Control Panel” Page.
Step Number 2, I will recommend you to go to Control Panel/Ease Of Access/Speech Recognition.
Step Number 3, In your Screen on the Left Side, You will Need to Hit on the “Advanced Speech Option” Button.

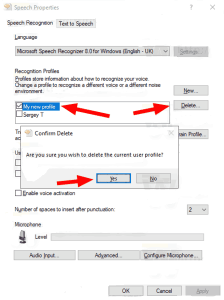
Step Number 4, If you are in Speech Properties Dialog you will need to Select the Profile you wish to delete from Speech Recognition in Windows 10.
Step Number 5, You will Need to Hit on the Delete Option next to the Profile List.

Step Number 6, You will Need to Confirm the Operation. Now Your Profile is Completely Deleted.
If You Have Any Kind Of Question You May Ask In The Comment Section Below.


One Comment